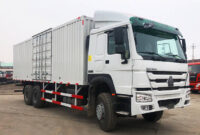
Truck Body Parts Diagram: Your Comprehensive Guide to Understanding Vehicle Anatomy pickup.truckstrend.com
The rumble of a powerful engine, the sheer scale of its presence, and its indispensable role in logistics and everyday life make the truck an engineering marvel. But beyond the gleaming chrome and impressive horsepower lies a complex architecture of interconnected components, each serving a vital purpose. Understanding this intricate structure is where the Truck Body Parts Diagram becomes an invaluable tool. Far more than just a picture, a truck body parts diagram is a detailed visual representation that dissects a truck into its individual components, illustrating their relationships, locations, and sometimes even their part numbers.
Whether you’re a seasoned mechanic, a fleet manager, a truck owner, or simply an enthusiast, a comprehensive grasp of these diagrams is crucial. It empowers you to accurately identify parts for repair or replacement, understand the vehicle’s structural integrity, troubleshoot issues, plan customizations, and communicate effectively with service professionals. In essence, it’s the blueprint that reveals the "what," "where," and "how" of a truck’s physical composition, transforming a daunting machine into an understandable system.
Truck Body Parts Diagram: Your Comprehensive Guide to Understanding Vehicle Anatomy
The Foundation: Chassis and Frame Components
At the very core of any truck lies its chassis and frame – the unsung heroes that provide the structural backbone and support for the entire vehicle. Understanding these foundational elements through a diagram is paramount, as they bear the immense loads and absorb the stresses of operation.
- Frame Rails: These are the primary longitudinal beams that run the length of the truck, typically made of high-strength steel. They form the rigid platform to which all other components are attached. Diagrams will show their thickness, curvature, and mounting points.
- Crossmembers: Connecting the two frame rails horizontally, crossmembers provide lateral rigidity, preventing the frame from twisting or flexing excessively. Their placement is critical for supporting the powertrain, suspension, and body.
- Axles (Front and Rear): The axles support the weight of the truck and its cargo, connecting the wheels to the chassis. Diagrams differentiate between steering axles (front) and drive axles (rear, often multiple for heavy-duty trucks), showing their housing, differential, and connection points to the suspension.
- Suspension Components: This includes leaf springs, coil springs, shock absorbers, air springs, control arms, and sway bars. Diagrams illustrate how these components work together to cushion the ride, maintain tire contact with the road, and support the vehicle’s weight. Their proper identification is critical for ride quality and load capacity.
- Steering Gearbox and Linkages: For the front axle, the diagram will detail the steering gearbox, drag links, tie rods, and steering knuckles, showing how driver input translates into wheel direction.

Understanding these foundational components is essential not only for structural integrity and load-bearing capacity but also for ensuring safe operation and proper handling. Damage or wear in these areas can have severe implications for the entire vehicle.
The Enclosure: Cab and Interior Parts

The cab is the command center and the driver’s sanctuary. Its components, while seemingly aesthetic, play a critical role in safety, comfort, and operational efficiency. Diagrams for the cab section are often highly detailed, reflecting the complexity of modern truck interiors.
- Cab Structure: This encompasses the roof, floor, A, B, and C pillars, door frames, and firewall. These structural elements are designed for occupant protection in the event of a collision, with diagrams highlighting crumple zones and reinforcement points.
- Doors: Beyond the outer panel, diagrams show the inner door structure, window regulators, latch mechanisms, hinges, and sealing components. Understanding these is vital for proper sealing, security, and operation.
- Dashboard and Instrument Panel: This intricate assembly houses the gauges, warning lights, infotainment system, climate controls, and various switches. Diagrams help identify individual modules, wiring harnesses, and mounting points, crucial for electrical troubleshooting and component replacement.
- Seating: Diagrams illustrate the seat frame, cushions, adjustment mechanisms (manual or power), and seatbelt anchor points. Proper identification is key for comfort, ergonomics, and safety.
- Steering Column and Controls: This includes the steering wheel, airbag module, turn signal stalks, wiper controls, and sometimes shifter mechanisms. Diagrams show the column’s articulation, mounting, and electrical connections.
- Interior Trim and Liners: From headliners to door panels and floor coverings, these components contribute to the cab’s aesthetics and noise insulation. Diagrams help identify clips, fasteners, and specific panel shapes for removal and reinstallation.

A well-maintained cab ensures driver comfort, reduces fatigue, and enhances safety. Diagrams are indispensable for diagnosing issues like water leaks, electrical malfunctions, or worn-out interior components.
The Workhorse: Cargo Area and Bed Components
The cargo area is where a truck earns its keep, and its design varies widely depending on the truck’s intended purpose. Diagrams for this section are critical for understanding load capacity, securing cargo, and specialized functionalities.
- Standard Pickup Bed: For light-duty trucks, this includes the bed floor, side walls, wheel wells, and tailgate. Diagrams detail the inner and outer bed panels, cross sills, mounting points to the frame, and tailgate hinges/latches.
- Flatbed: These are simple, open platforms, but diagrams will show the frame structure, decking material, stake pockets, tie-down points, and potential headache racks or side rails.
- Dump Body: Highly specialized, a dump body diagram shows the bed itself, the hydraulic lift cylinders, pump unit, PTO (Power Take-Off) connections, pivot points, and tailgate release mechanisms.
- Box/Van Body: Common on medium-duty trucks, these enclosed bodies have specific diagrams for the side panels, roof, floor, rear roll-up or swing doors, and often interior shelving or securing systems.
- Specialized Bodies: This category is vast, including refuse compactors, concrete mixers, tow truck wrecker bodies, utility service bodies, and refrigerated units. Each has highly specific diagrams detailing its unique mechanical, hydraulic, or refrigeration components. For example, a tow truck diagram would show the boom, winch, outriggers, and control panels.
Understanding the cargo area’s components is vital for ensuring secure load transport, preventing damage to goods, and maintaining the operational efficiency of specialized equipment. Incorrect or damaged parts can lead to unsafe conditions or costly downtime.
The Essentials: Exterior and Functional Components
Beyond the core structure and cargo area, a myriad of exterior components contribute to a truck’s safety, visibility, and overall functionality. These parts are often the first to sustain damage in minor incidents and are crucial for road legality.
- Lighting System: Diagrams detail headlights (including high/low beams, DRLs), taillights (brake, turn, reverse), marker lights (side, roof, clearance), fog lights, and license plate lights. They show bulb types, housing assemblies, and wiring connections, which are essential for visibility and compliance.
- Bumpers and Grilles: Front and rear bumpers are designed to absorb impact and protect vital components. Grilles allow airflow to the engine’s cooling system. Diagrams show their mounting points, materials, and associated trim pieces.
- Fenders and Wheel Wells: These protect the vehicle from road debris thrown by the tires. Diagrams illustrate their shape, attachment points, and inner liners.
- Mirrors: Side mirrors (often large and multi-pane for trucks) are critical for visibility. Diagrams show their mounting, adjustability mechanisms (manual or power), heating elements, and integrated turn signals.
- Steps and Running Boards: Facilitating entry and exit, these components are shown with their mounting brackets and anti-slip surfaces.
- Fuel Tanks: External fuel tanks, especially on heavy-duty trucks, are clearly depicted with their straps, filler necks, fuel lines, and sending units.
- Aerodynamic Components: Fairings, side skirts, and roof deflectors are designed to improve fuel efficiency and are shown in diagrams with their mounting hardware.
These exterior components are not just aesthetic; they play a critical role in safety, regulatory compliance, and the overall operational efficiency of the truck.
Reading and Utilizing a Truck Body Parts Diagram
A truck body parts diagram is a powerful tool, but its effectiveness hinges on your ability to read and interpret it correctly.
- Understanding Exploded Views: Most diagrams present parts in an "exploded view," meaning components are shown slightly separated from each other, but still indicating their assembly order and relationship. This helps visualize how parts fit together.
- Identifying Numbering and Legends: Each component in a diagram is typically assigned a unique number. A corresponding legend or parts list will then provide the part name, description, and often the manufacturer’s part number. Always cross-reference the number on the diagram with the legend.
- Leveraging Different Perspectives: Diagrams often include multiple views (front, side, top, cross-sectional) to give a comprehensive understanding of a component’s placement and orientation.
- Benefits of Utilization:
- Accurate Part Identification: The primary benefit. No more guessing or ordering the wrong part.
- Troubleshooting: By seeing how components connect, you can better diagnose issues like leaks, electrical shorts, or mechanical failures.
- Repair and Assembly Guidance: Diagrams act as step-by-step guides for disassembly and reassembly, showing fastener locations and torque specifications.
- Customization Planning: Understanding existing structures helps in planning modifications, ensuring compatibility and safety.
- Communication: Provides a common visual language for discussing repairs or parts with mechanics, suppliers, or other enthusiasts.
Tips for Effective Use: Always use the diagram specific to your truck’s make, model, year, and often its VIN (Vehicle Identification Number) to ensure accuracy. OEM (Original Equipment Manufacturer) service manuals and online parts catalogs are the best sources for these diagrams.
Importance of Part Quality and Potential Challenges
When it comes to replacing truck body parts, the choice between OEM (Original Equipment Manufacturer) and aftermarket parts is a significant consideration, often highlighted by the details in diagrams.
- OEM Parts: These are identical to the parts originally installed on your truck, ensuring perfect fit, finish, and performance. Diagrams provided by manufacturers are specifically for these OEM parts, making identification seamless. The challenge can be higher cost.
- Aftermarket Parts: Produced by third-party companies, these can be more affordable. While many aftermarket parts are high quality, some may have slight variations in fit or material. Diagrams might not always perfectly match aftermarket equivalents, requiring careful comparison.
Challenges in Sourcing and Installation:
- Identifying Correct Part Numbers: Even with a diagram, slight variations in model year, trim level, or specific options can mean different part numbers. Always double-check with your VIN.
- Availability: For older or specialized trucks, finding specific body parts can be challenging.
- Installation Complexity: Some body parts, especially structural components or those integrated with electrical systems, require specialized tools, knowledge, and sometimes welding or painting, making DIY installation difficult or ill-advised.
- Safety Standards: Structural body parts directly impact crashworthiness. Using sub-standard or improperly installed parts can compromise safety.
Practical advice: For critical structural or safety-related components (e.g., frame, cab pillars, suspension mounts), investing in OEM parts is often the safest and most reliable choice. For cosmetic or less critical components, high-quality aftermarket options can be a cost-effective alternative, but always prioritize fit and material quality.
Sample Price Table for Common Truck Body Parts
Please note: The prices listed below are estimates only and can vary significantly based on truck make, model, year, part quality (OEM vs. aftermarket), supplier, location, and market conditions. This table is for illustrative purposes.
| Part Category | Specific Part | Estimated Price Range (USD) | Notes |
|---|---|---|---|
| Cab Components | Front Bumper (Chrome) | $300 – $1,500 | Varies by truck size and trim level. Aftermarket often cheaper. |
| Headlight Assembly (each) | $150 – $700 | Includes housing, lens, and sometimes bulbs. LED versions are pricier. | |
| Side Mirror (Power/Heated) | $200 – $800 | Varies by features (power fold, blind spot monitoring). | |
| Fender (Front) | $100 – $500 | Unpainted, ready for prep and paint. | |
| Door Shell (Bare) | $400 – $1,500 | Does not include inner components (window, latch, trim). | |
| Grille Assembly | $150 – $1,000 | Varies greatly by design and material. | |
| Cargo Area | Tailgate (Pickup Truck) | $300 – $1,200 | Unpainted, can be bare or include hinges/latches. |
| Pickup Bed (Complete, New) | $1,500 – $4,000 | For light-duty trucks. Often more cost-effective to repair or buy used. | |
| Dump Body Hydraulic Cylinder | $800 – $3,000+ | Specific to dump trucks. Varies by lift capacity and type. | |
| Chassis & Frame | Leaf Spring (Rear, each) | $150 – $600 | Varies by number of leaves and weight rating. |
| Shock Absorber (each) | $50 – $250 | Varies by truck type (light vs. heavy-duty) and quality. | |
| Frame Rail Section (Repair) | $500 – $2,500+ | For severe frame damage, often requires professional repair/replacement. | |
| Miscellaneous | Fuel Tank (External, 50-gal) | $400 – $1,500 | For larger trucks. Does not include sending unit or lines. |
| Running Board/Step (Pair) | $100 – $700 | Varies by material (steel, aluminum) and design. |
Frequently Asked Questions (FAQ)
Q1: What exactly is a Truck Body Parts Diagram?
A1: It’s a visual guide, similar to an exploded view or blueprint, that shows all the individual components that make up a truck’s body. It illustrates how these parts connect, their relative positions, and often includes part numbers for identification.
Q2: Why is it important to know about these diagrams and parts?
A2: Understanding these diagrams is crucial for accurate part identification for repairs, maintenance, or customization. It helps in diagnosing issues, ensures you order the correct replacement parts, facilitates effective communication with mechanics, and is essential for understanding your truck’s structural integrity and safety features.
Q3: Where can I find a Truck Body Parts Diagram for my specific truck?
A3: The best sources are the official service manuals from the truck manufacturer (OEM), online OEM parts catalogs (often accessible via dealership websites), and reputable aftermarket parts suppliers’ websites which sometimes offer diagrams. Always use your truck’s VIN to ensure you get the exact diagram for your specific model and year.
Q4: Are aftermarket body parts as good as OEM parts?
A4: It depends on the aftermarket manufacturer. Many produce high-quality parts that meet or exceed OEM specifications and are often more affordable. However, some may offer lower quality or imperfect fit. For critical structural or safety-related components, OEM parts are generally recommended for guaranteed fit and performance. For cosmetic parts, high-quality aftermarket options can be a good alternative.
Q5: Can I replace truck body parts myself, or do I need a professional?
A5: Simple replacements like headlights, taillights, or some exterior trim pieces can often be done by a knowledgeable DIYer. However, more complex parts involving structural integrity (e.g., frame sections, cab pillars), advanced electrical systems, or specialized tools (e.g., welding, hydraulic systems) should be left to certified professionals to ensure safety and proper functionality.
Q6: How do I identify the correct part number from a diagram?
A6: Most diagrams will have numbers pointing to specific components. There will be a corresponding legend or parts list, usually on the same page or an adjacent one, that lists these numbers alongside the part name and its unique manufacturer part number. Always double-check the part number against your truck’s VIN if possible, as variations exist.
Conclusion
The Truck Body Parts Diagram is far more than a mere illustration; it is a vital navigational chart for anyone involved with these powerful machines. From the foundational chassis that supports monumental loads to the intricate details of the cab and specialized cargo areas, each component plays a role in the truck’s performance, safety, and longevity. By taking the time to understand and utilize these diagrams, you gain an unparalleled insight into your vehicle’s anatomy. This knowledge not only empowers you to make informed decisions regarding maintenance, repairs, and upgrades but also fosters a deeper appreciation for the complex engineering that keeps the world moving. Embrace the blueprint, and you unlock the full potential of your truck.
